Your cart is currently empty!
Free Shipping on all orders over $75!
Knitting How-To: Working a Magic Loop
By
.
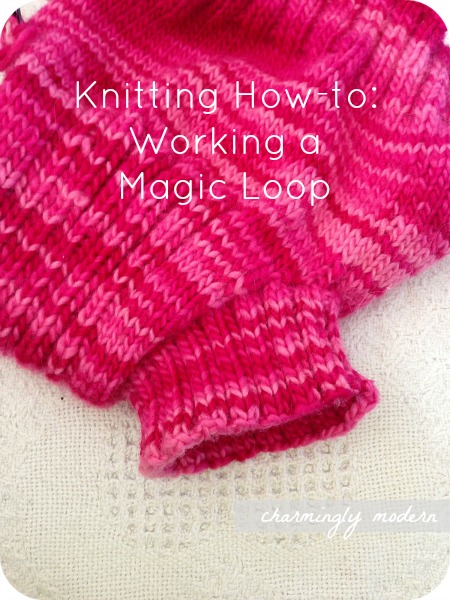
When I make my wool soakers, I use a technique called “magic loop”. Magic Loop is useful for knitting in the round in really tight spaces, while still using a circular needle. It’s a great option if you don’t have the space for double pointed needles or simply just don’t want to mess with them.
I was really intimidated at first to use this technique, but I’m so glad I learned it. It’s really handy! I’ve put together a little picture tutorial on how to do the magic loop technique, to hopefully help anyone else out there wanting to try this out. I hope you’ll find it useful! You only need one thing – a 32″ or 36″ circular needle in the size called for in your pattern. For this tutorial, I’m using a size six 32″ circular (and I’m knitting with Lamb’s Pride worsted weight wool, in Strawberry Smoothie, in case you’re wondering!).

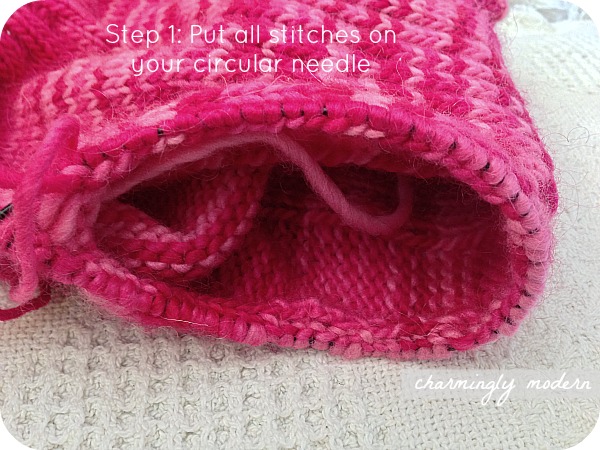
In my particular pattern, I have to pick up stitches along a knitted edge. For this size, I had to pick up 64 stitches to begin the formation of the leg cuff. I knit into the picked up stitch so there is no bumpy edge. It’s really easy to pick up stitches with a huge circular – I pick up about 10 at a time then slide them off the needle onto the cable. The cable ends up holding all of the stitches so nothing gets stretched out along the way.
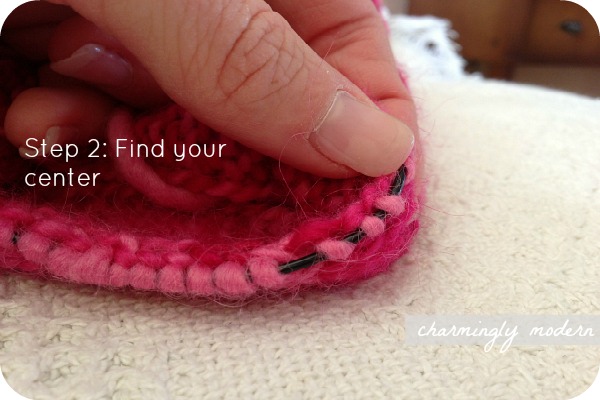
Now, you’ll have to split your stitches. The key concept of a magic loop is you divide your stitches – you knit the first half and the second half waits on the loop. Since I have an even number (64), I’m counting down 32 stitches from the first stitch I picked up. When I find that mark, I separate the stitches slightly so I can see the cable.
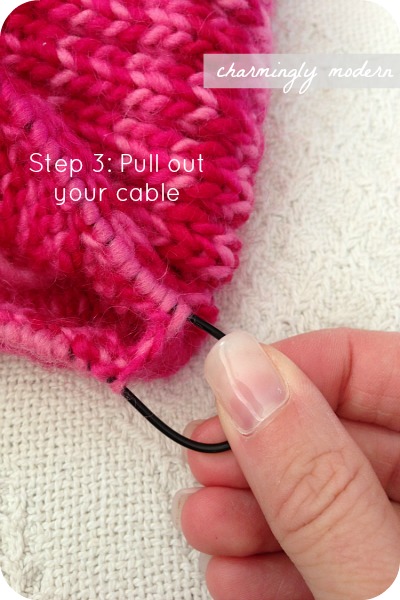
Now that you have your center, you’ll need to pull the excess cable out. I just squeeze the two halves of the cuff together, put my fingernail under the cable that’s sticking out where my center is, and pull it out.
Now your knitting will look something like this:
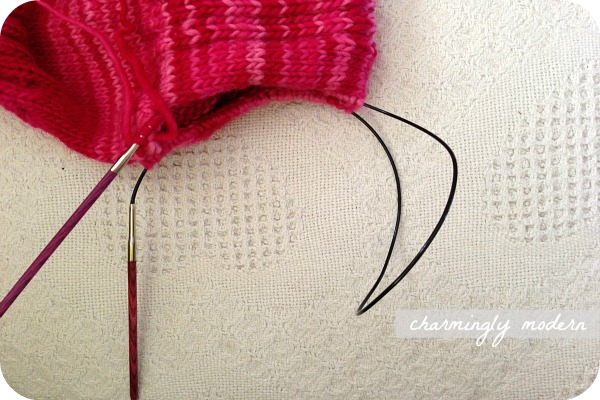
Next, you’ll hold the knitting like you normally would – with the working needle in your right hand and in your left hand the needle with the stitches you’ll be knitting into. You’ll need to push all of the stitches you’ll be knitting onto the left needle. They might be tight this first go around – mine usually are. Your right hand needle will have no stitches on it. All of the stitches on the right side of your work will be hanging out on the cable. The purple needle in the picture below is my right needle, so you can see all of those stitches hanging out on the cable below the needle.
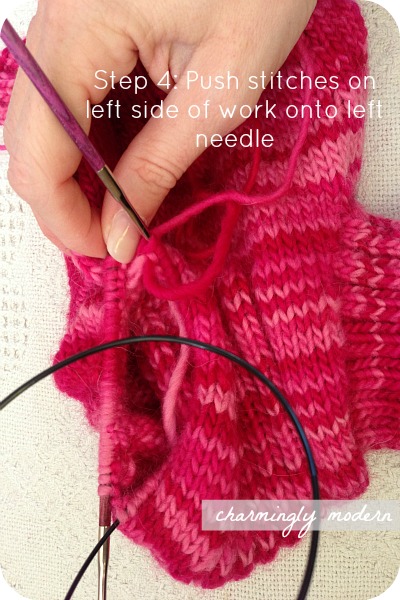
Next, use the right needle to knit the stitches on the left needle like you normally would knit (**Please note, you’ll want to pull the first stitch pretty tight to avoid a gap between the two halves**). And, like normal, all of the stitches from the left needle will be transferred to the right one. In the picture below, you can see I’m going to be working a 2×2 rib.
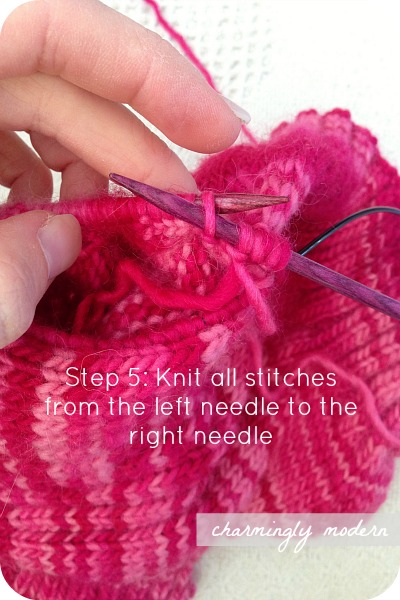
Here’s a better picture where you can see the loops that are created with the cable on the needles:
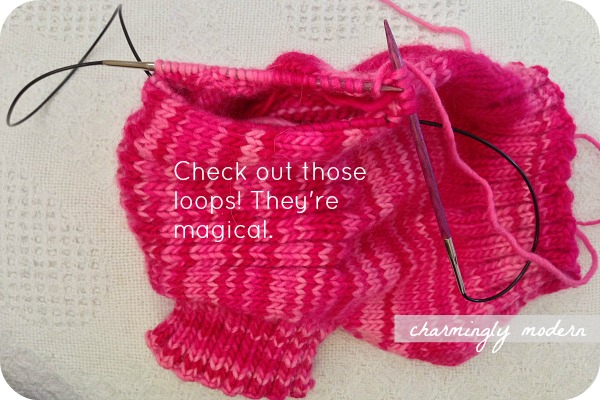
When you’ve knitted all of the stitches from your left needle onto your right, you’ll turn your work (in my case, I turn it so it’s upside down) and knit the stitches you had been holding on the cable. Your work will look like this immediately after knitting the stitches onto the right needle and turning it:
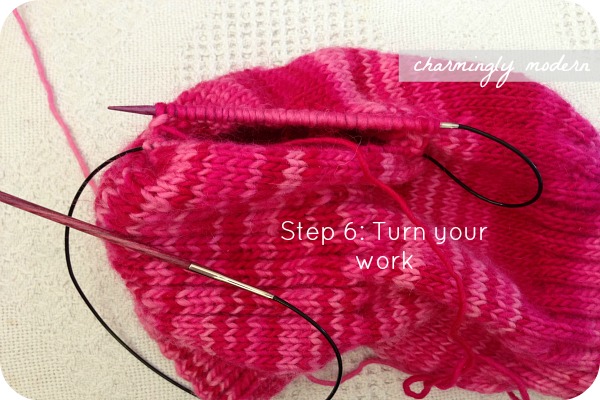
You can see the left needle is now free and the right needle contains all of the stitches I just knit. You’ll notice the needle tips are now facing the bottom (or crotch, in this case) of my work – whereas, in the pictures above, the needle tips are all facing the waistband. So this should help you visualize the turning aspect.
With the work now turned, you can knit the remaining half of the stitches. To do this, you’ll need to push the un-knit stitches onto the left hand needle, just like you did in Step 4. I just pull the cable down, then push the stitches onto the needle. Like in Step 4, this first time the stitches might be tight on the needle. They’ll loosen up, though, so don’t worry.
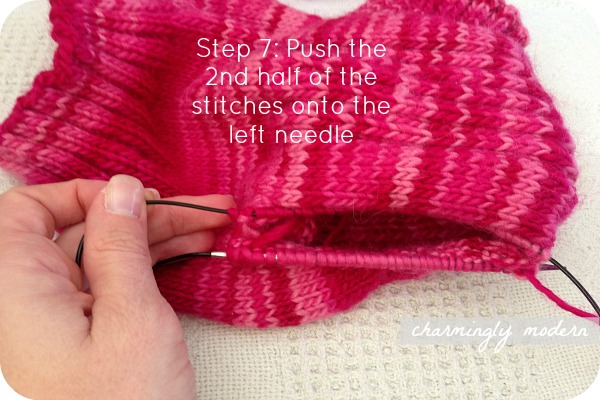
Now, your needles are going to look like this – kinda scrunched!
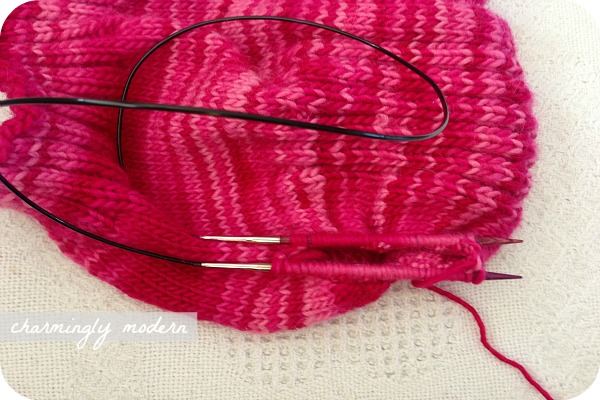
To complete this round worked in magic loop, all you do is pull the right needle up and off those stitches, so they hang out on the cable, and use the right needle to knit the stitches on the left needle. Easy peasy! Don’t forget to pull the first stitch you knit pretty tightly to avoid any gaps.
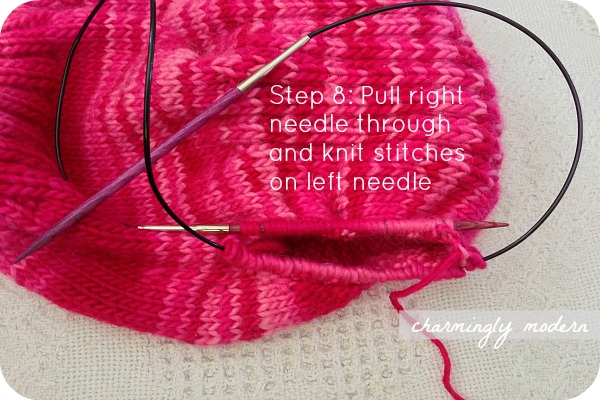
Once all of the stitches are knitted onto the right needle, you’ve completed your first round using magic loop. Repeat steps 4 through 8 for any additional rounds you need, then pat yourself on the back for learning a new knitting skill 🙂
Feel free to pin this to Pinterest – just put your mouse over any image and a “Pin It” button will appear. Happy knitting!
Leave a Reply