Your cart is currently empty!
Free Shipping on all orders over $75!
How to Read a Yarn Label: Choose the Right Yarn for your Knitting Project
By
.
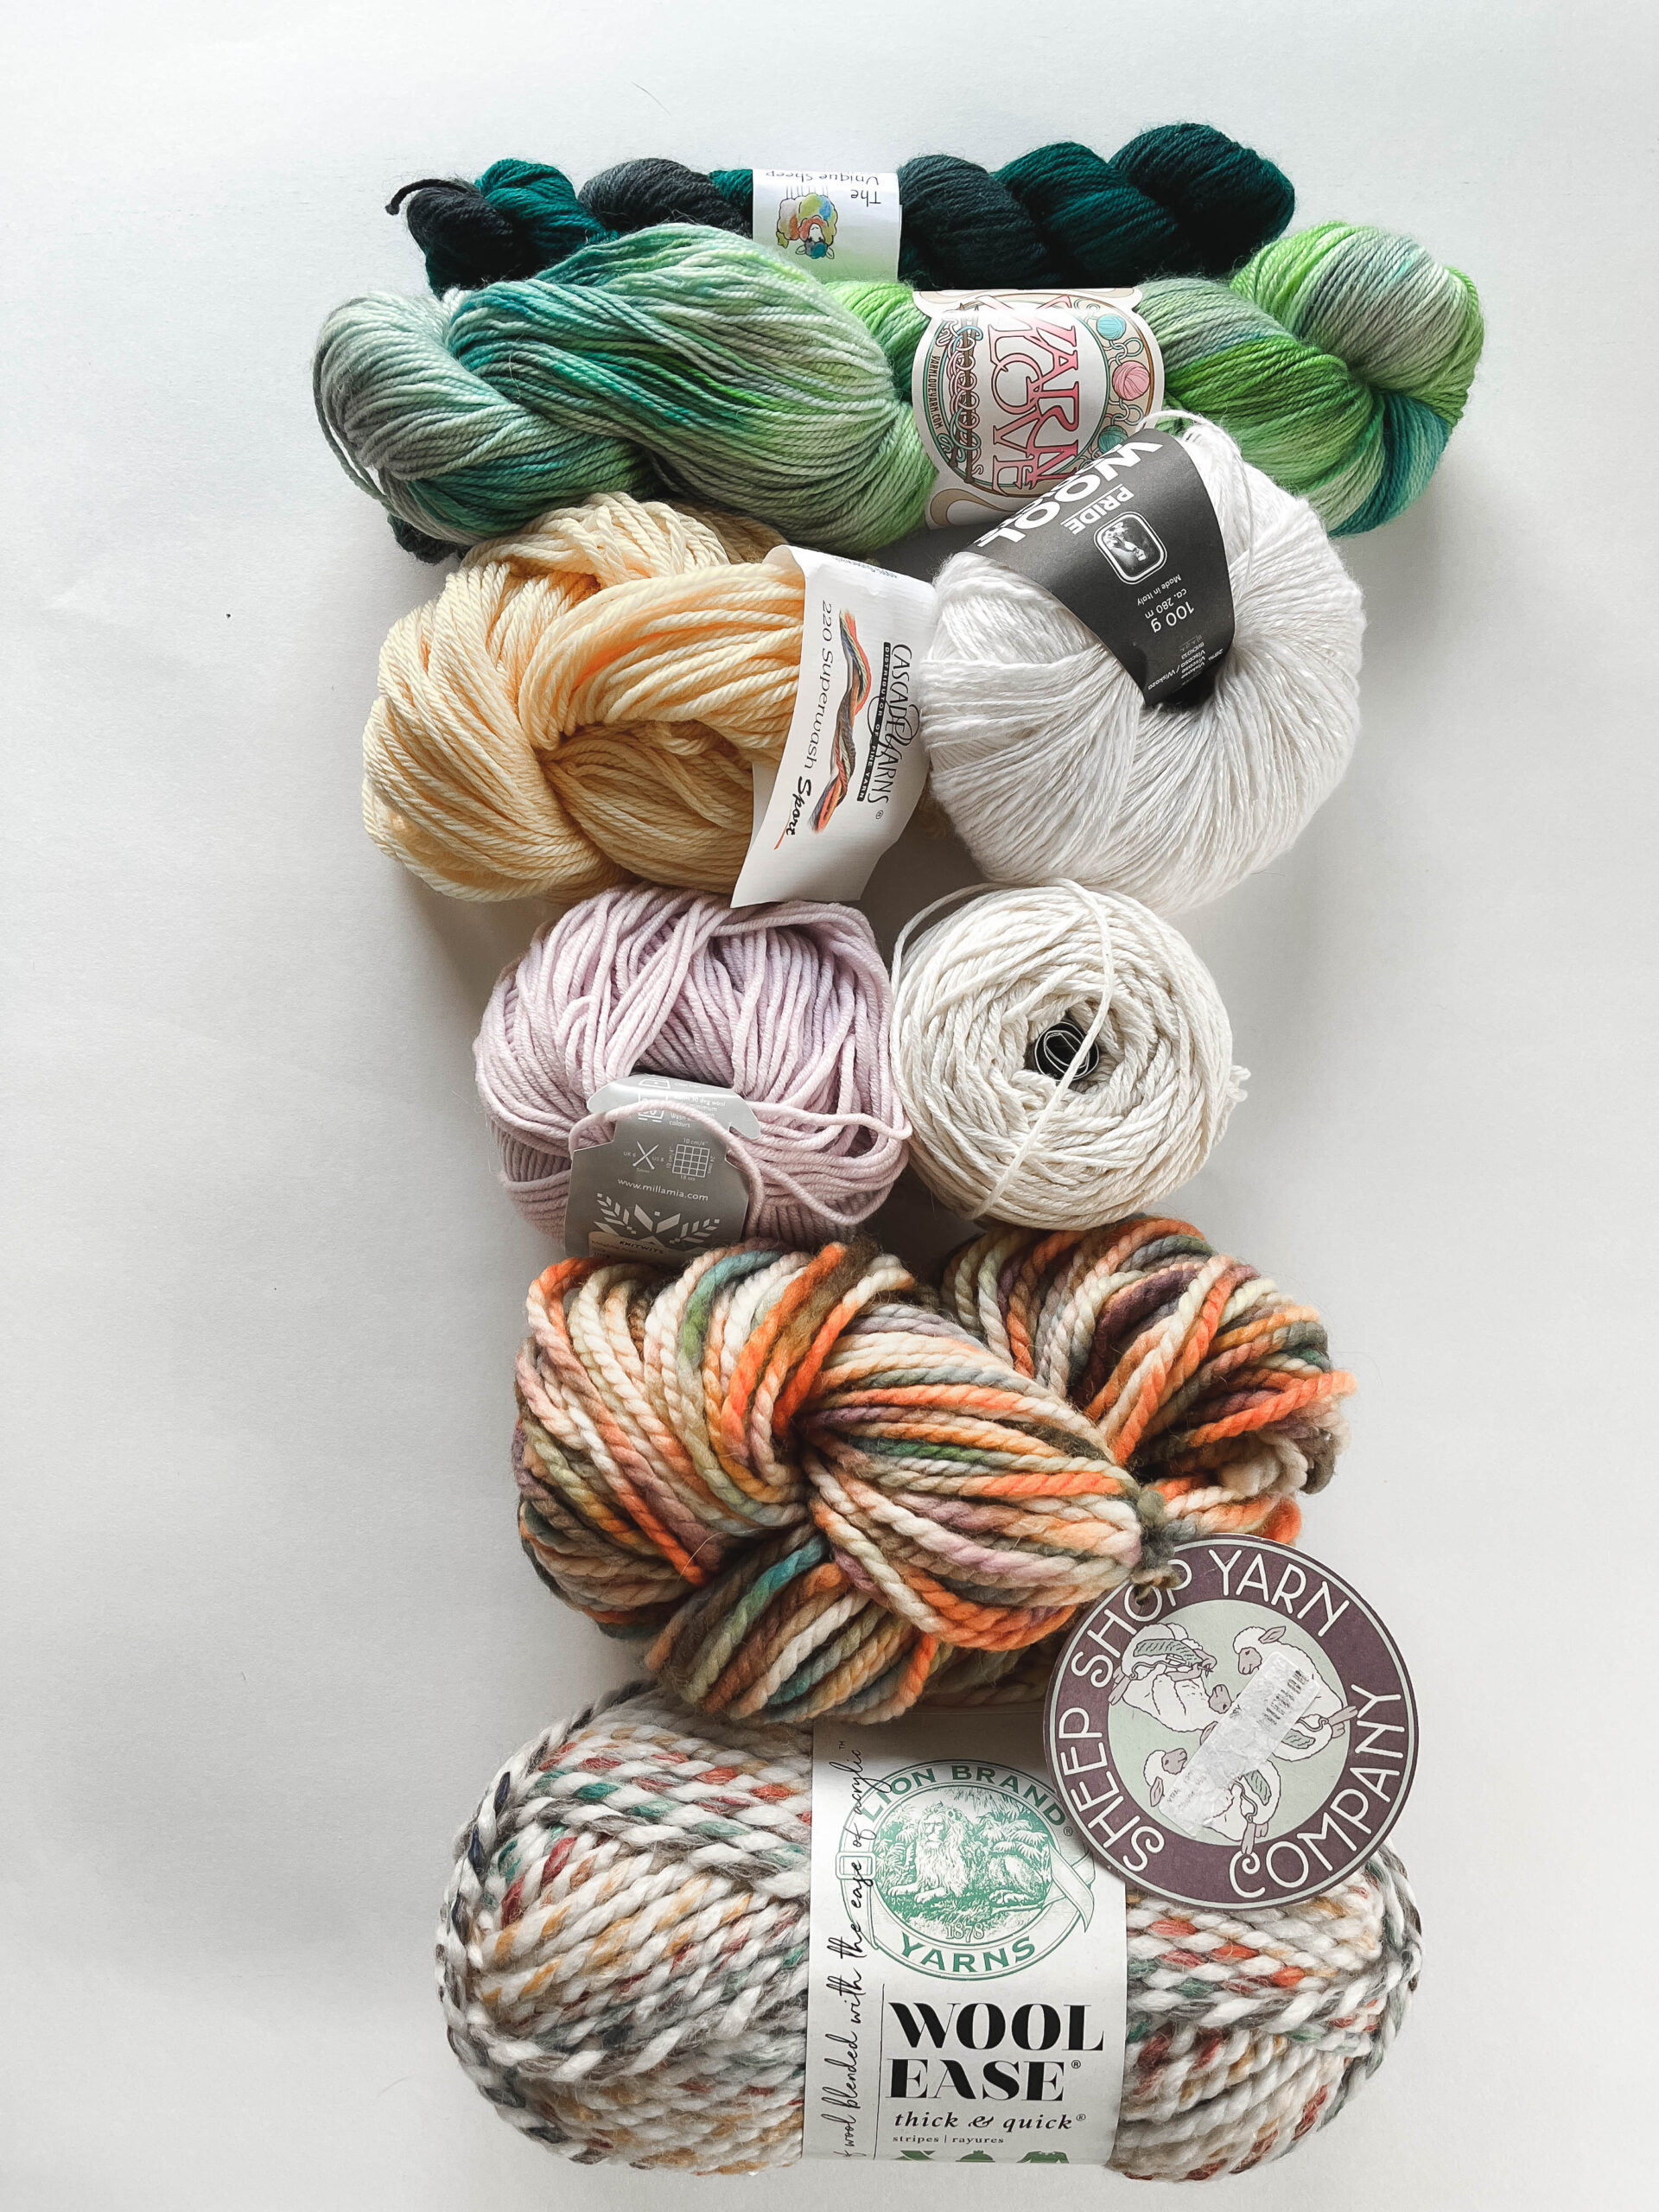
Something that usually surprises new knitters is just how important yarn choice is when starting a knitting project.
Picking the right yarn is a lot more than liking the color and feel of the fiber. In fact, there’s an entire science behind every yarn selection and whether or not it will actually create a finished object that looks (and fits) like the pattern photos.
Knowing which yarn is the “right” yarn starts with knowing how to read a yarn label.
Usually a knitting pattern will have a suggested yarn – either an exact brand, or a suggested weight. On top of that, the pattern will have a specific needle size you should use with that yarn (because there’s more than one knitting needle size!) as well as something called a pattern gauge.
Pattern gauge is what determines the finished size of your project using the suggested yarn and needles outlined in the pattern.
Which, by the way, if you’ve ever cast on a project without paying attention to the suggested yarn and needle size, then wondered why what you were making was vastly different than the pattern… now you know why.
That begs the question: if all that information about yarn choice and needle size is on the knitting pattern, then how do you take that information and use it to figure out the best yarn for the project? Especially if your pattern doesn’t specify a brand to use, or if you determine you don’t like the suggested yarn for whatever reason.
It all comes down to being able to read a yarn label. Yarn labels contain every piece of information you need to know to help you choose the right yarn for your knitting project.
Knowing which yarn is the ‘right’ yarn for your project starts with knowing how to read a yarn label.Click To TweetWhen you understand how to read a yarn label, you’ll know if you’re choosing the right yarn for any knitting project. Yes, any project!
That means you can tap into your creativity and feel free to experiment with other types of yarns, as long as they meet those requirements around needle size and weight set out in the pattern.
And that means when you find a hat, scarf or sweater pattern and the designer chose a yarn in a shade you don’t like, or with a fiber content you’re not thrilled about… guess what? The knowledge you’ve gained about reading yarn labels will empower you to make a choice better suited for your own tastes. Pretty fun, right?
Use the handy guide here to help you become a total pro at reading yarn labels.
What is a yarn label?
A yarn label is exactly what it sounds like: it’s a band of paper wrapped around a ball, hank or skein of yarn.
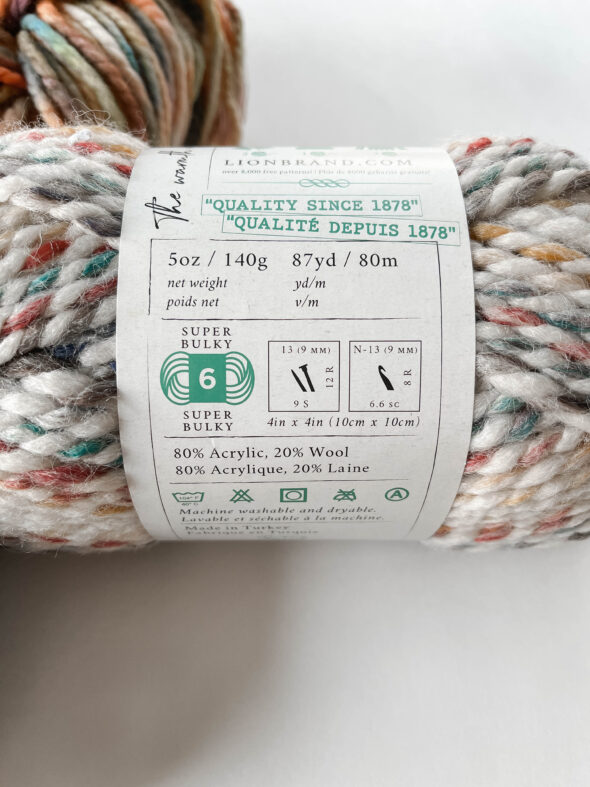
The label contains 7 pieces of important information about that yarn:
- The brand, dyer or company distributing the yarn
- The name of the color and the dye lot associated with it
- The grams and yardage of the yarn (in other words, how much yarn is contained inside this particular ball)
- The category weight of the yarn (aka, it’s thickness level)
- What needle size works best with this particular weight of yarn, aka its gauge
- The fiber content (meaning, what exactly makes up this yarn?)
- Care instructions
Let’s break down each component of the yarn label so next time you go yarn shopping, you know exactly which yarn is the best choice for your pattern.
How to read a yarn label’s 7 key components:
The 7 key components of a yarn label listed above each have their own details to understand. Below is everything you need to understand whether you’re a beginner knitter, intermediate or more advanced.
Yarn Label Component #1: Brand, Dyer and/or Company
Usually, the first thing you’ll notice on a yarn label is who made the yarn! The company, brand, or dyer will put their name and/or their logo in a prominent place on the label.
This area will also tell you any name the yarn you’re looking at has within the company.
For example, some dyers like to give their yarns fun or unique names based on the collection they’re a part of.
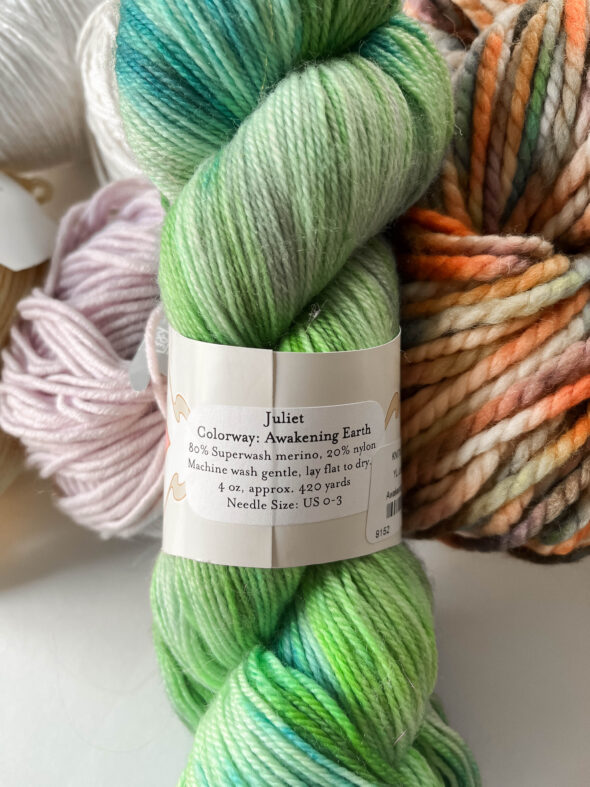
The yarn pictured is called Juliet and the colorway (the name of the color) is “Awakening Earth.” The brand that made this particular yarn is Yarn Love. They have some really beautiful sock yarns that have pretty fun names.
Yarn Label Component #2: Color Information
Sometimes a brand will name the color of the yarn something fun, interesting or descriptive, like you just saw with the Yarn Love label. If there isn’t a specific name for the color, there will be a series of numbers that identify the color.
Related to this, you’ll also see the dye lot number noted. When yarn is dyed, it’s done in groups. The groups of yarn that are dyed together at the same time are lumped under a dye lot. That dye lot is given a specific identification number.
This is really useful to know if you’re purchasing a lot of yarn for a large project (like a sweater). You want the yarn to all have the same exact color – aka, all be from the same dye lot – for your project
Believe it or not, even with big box brands, there can be slight variations in color between dye lots. Even if the same exact formula is used for the dye every time, small factors like temperature, humidity, or even the yarn itself can change how the color looks.
Here’s an example of this in action.
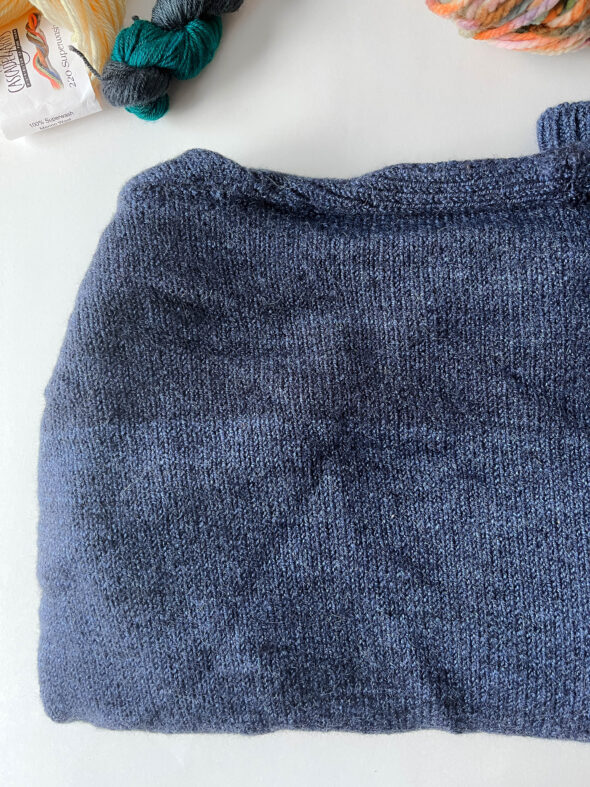
Below is a cardigan sweater I knit out of Malabrigo yarn that was all the same color, but 2 of the hanks were from a different dye lot than the rest.
I made the mistake of not checking the dye lot when purchasing all the yarn! Can you see the line that divides the 2 dye lots? You’ll notice at the top of the cardigan the blue is slightly deeper compared to the lower part. This is how big of a difference a dye lot can make with your project.
#3 Grams and Yardage (physical weight)
Yarn has two types of weight: physical and categorical. We’ll talk about category in a moment. Physical weight describes how much the yarn weighs in grams, as well as the length of the yarn.
Yarn comes to you in a few different forms. All of these can drastically vary in terms of weight and yardage.
Here are the most common ways you’ll see yarn being sold:
- Hank – A hank is a large ring of yarn that’s been twisted into a figure eight shape. A yarn label is wrapped around the center to secure it. When you untwist a hank of yarn, you’ll need to wind it into a ball because you won’t be able to knit from the loose ring.
- Skein – This is how most yarn sold at big box stores is wound. Usually a skein is a cylinder shape, with the ability to pull the yarn from the outside or the center. It has a yarn label wrapped around the center.
- Ball – This is what it sounds like: a ball of yarn, where you pull the yarn from the outside. Usually, you’ll turn a hank into a ball (like I explained up a little further) but sometimes you’ll see yarn being sold this way.
Whether it’s a hank, skein or ball, you’ll need to know how much yarn you have.
There are a few standards of length and weight – for example, if you’re knitting with sock yarn, usually the length and weight of the yarn is enough for a pair of socks. So in that case, generally speaking, you know one hank of yarn is enough for a pair of socks.
But if you’re knitting a larger project, like a sweater or a baby blanket, or if you’re using novelty yarns that don’t really follow any particular standard, paying close attention to the weight and yardage is crucial.
Additionally, if you find yourself with leftover yarn and you’re really not sure how much is left in terms of yards, you can use a small weight scale like a postal scale to weigh you yarn in grams. Then, you can use a simple formula to estimate the remaining yards based on the information on the label.
For example, if your yarn label indicated the hank you were using was 50 grams and 137 yards, you have a starting point. Your next step is to weigh the yarn you have left (you can use a postal scale). Let’s pretend it tells you you have 18 grams remaining. Now, you can setup a basic equation to determine the yardage 18 grams is equivalent to.
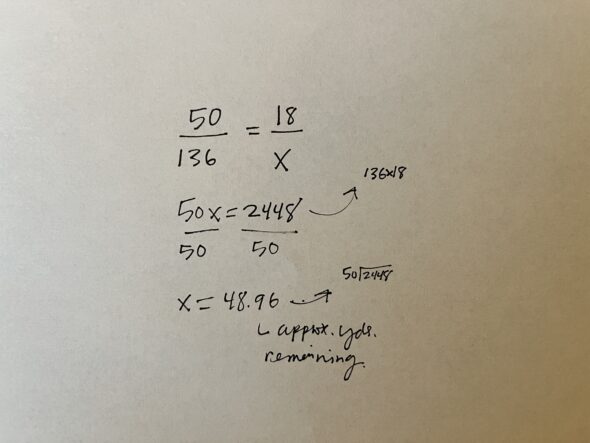
Remember cross multiplication from school?! Who knew you’d be using that and pre-algebra again as a knitter – but it’s very useful!
As long as you have like measurements on each “level,” this type of equation works in various ways to help you work out knitting things.
In this example, the grams are along the top, and the yards are on the bottom.
50 grams is equivalent to 136 yards is on the left, and 18 grams is equivalent to a mystery amount of yards (X) on the right. Cross multiply, then solve for X with division and voila! You know that 18 grams equals about 49 yards.
#4 Category weight
The type of yarn you choose will have different characteristics when it comes to a finished project based on what’s called the “category weight” of that yarn.
In other words: different types of yarn (whether it’s a thicker yarn, chunky yarn, or something very lacy) will create a different look based on their category weight. Think about it: if you use a very thin yarn to knit a hat, the stitches will be super small. Contrast that against a bulky yarn, the stitches will have a lot of definition (be very visible).
You’ll know you’re looking at the category weight of the yarn when you see things like “bulky yarn”, or “sport weight yarn” on the label.
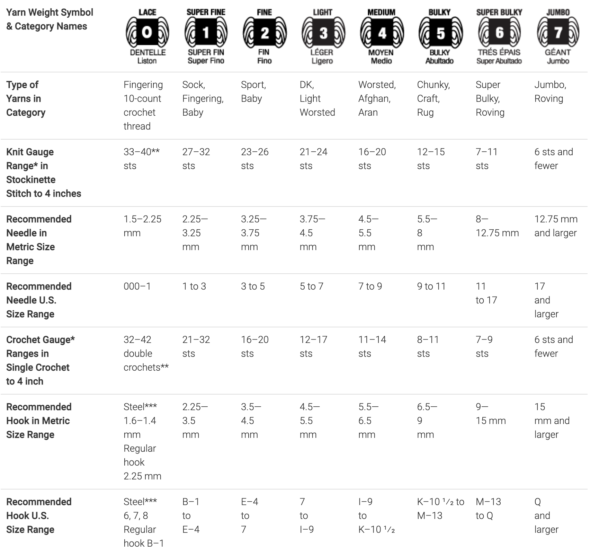
The Craft Yarn Council created these definitions, which have become the standard yarn weight system. It’s a good idea to pay close attention to them – remember your knitting pattern is going to tell you something like, “Use a dk weight yarn for this project.” Knowing how the yarn is classified by the yarn weight system is how you’ll know if it’s DK or not!
Based on the photo, you see there are numbers associated with each category weight. Sometimes a yarn label will only show the number icon, other times they’ll name the category weight itself and not display the icon.
Here’s a brief description of each yarn category weight:
0 Lace – These are thinner yarns that are very delicate and usually used in crochet (think: doily).
1 Super Fine – This is usually where your sock, fingering, or baby yarns fall. You can also consider this a lace weight yarn for knitting projects (think: shawls), because they’ll really showcase stitch definition. They’re also a great choice for baby garments (not blankets) like sweaters, hats, socks or jumpers because they’re lighter.
2 Fine – This is usually sport weight yarn. This is slightly thicker than super fine, so it’s also great for lightweight garments like scarves, shawls or wraps. I like using this for baby clothes, too.
3 Light – DK (double knitting) yarn usually falls under this category, along with light worsted. Since it’s a lighter weight yarn, it’s good for garments like a summer shirt, hats or even sweaters that you don’t want to look bulky. It’s also very good for color work (which is knitting with multiple colors to create a design).
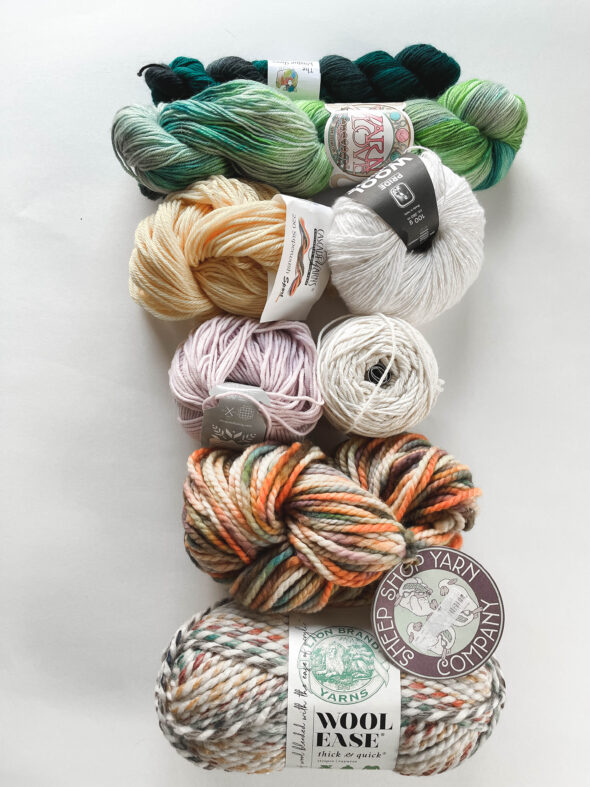
4 Medium – This is where worsted weight yarn is classified, as well as a few other groups like aran and afghan yarns. This category is the perfect yarn for new knitters because the yarn is thick enough to be able to see what you’re doing very easily, yet not so thick that it creates a very bulky project. It also tends to knit up fairly quickly, because the recommended needle size is on the medium side as well. Worsted yarn is great for clothing and accessories, as well as home items like blankets, washcloths, etc.
5 Bulky – Bulky weight yarn is grouped here! And it’s exactly what it sounds like… thicker yarns that create a bulky finished object. This yarn is great for blankets, thick scarves or hats, and sometimes sweaters if you’re going for that kind of look.
6 Super Bulky – Yep, the yarn just keeps getting thicker from here on out. Super bulky yarn is a good choice for heavy blankets, scarves or hats. Sometimes roving is classified here, as well, which is basically un-spun (or natural) fiber before it becomes plied yarn.
7 Jumbo – This is really just reserved for blankets, and roving. You typically won’t see this type of yarn available. Although with the arm knitting craze, I have seen more of this being sold at big box craft stores. Sometimes unique yarns are classified here, too – like, for example, yarns that have embellishments woven into the fiber.
Now that you understand the differences in the category weight, you can probably imagine how big of an impact that makes on the finished project, right?
Smaller-weight yarns are going to create very thin stitches, making them naturally better suited for things like socks, and baby clothes. Versus heavier-weight yarns that create thicker stitches, making them better suited for things like sweaters, scarves, blankets, etc.
#5 Needle Size & Gauge
That takes us to the next part of a yarn label. Because once you understand the role the category weight of a yarn plays, there’s something directly related to that: the gauge and suggested needle size.
Gauge is, in my opinion, the most important aspect of a knitting pattern. Gauge is a term that describes the formula for how a finished project’s size was determined.
In other words, gauge tells you how many stitches per inch you should see in the stitch pattern you’re using. There is always a recommended gauge based on the suggested needle size and yarn.
It’s usually something like: 22 stitches per 4″. This means that for every 4″ across, you’ll have 22 stitches. You can purchase a special gauge measurement tool to help you see this.
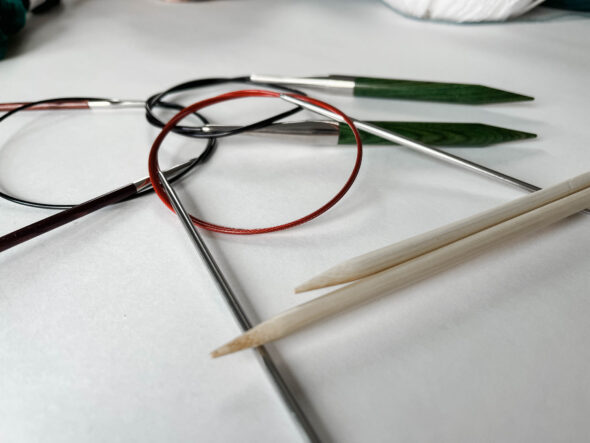
If your gauge is off, your finished object could end up being too small, too big, too tight, too loose – you get the idea.
How do you find out if you’re going to be “on gauge”? The most common way is to knit something called a “gauge swatch.” A gauge swatch is a square you knit using the suggested yarn and needle size specified in your pattern. Sometimes a pattern will tell you the gauge is based in a certain stitch pattern, like garter, stockinette or rib. In that case, you’d knit your swatch using that stitch pattern.
Typically you’ll knit the square to be about 6×6″. Once it’s complete, you’ll lay it flat and use your gauge measurement tool to see what your gauge is. From there you can decide if you need to adjust your needle size or not. For example, if your gauge is bigger than specified, you should go down a needle size or two. If it’s tighter than specified, you should go up a needle size or two.
And that’s the second thing to know about gauge.
Choosing the right size knitting needles really comes down to understanding how your unique style of knitting influences gauge. I tend to be a tight knitter. So I know whether I’m looking at a knitting pattern or a yarn label and the suggested gauge / needle size says X… I’m probably going to have to size up two needle sizes to achieve the gauge, to account for the tightness of my stitches.
#6 Fiber Content
Yarn texture is influenced by the fiber content, and that’s why this information is displayed on the yarn label. When you pickup a beautiful yarn that’s a superwash merino wool, it’s going to feel very different from an acrylic fiber, or a cotton yarn.
The type of fiber you’re knitting with will absolutely influence the drape, structure and feel of your finished object. When you’re looking at a knitting pattern and its suggested yarn, you not only want to pay attention to the category weight of that yarn, but you also need to understand the content of that yarn.
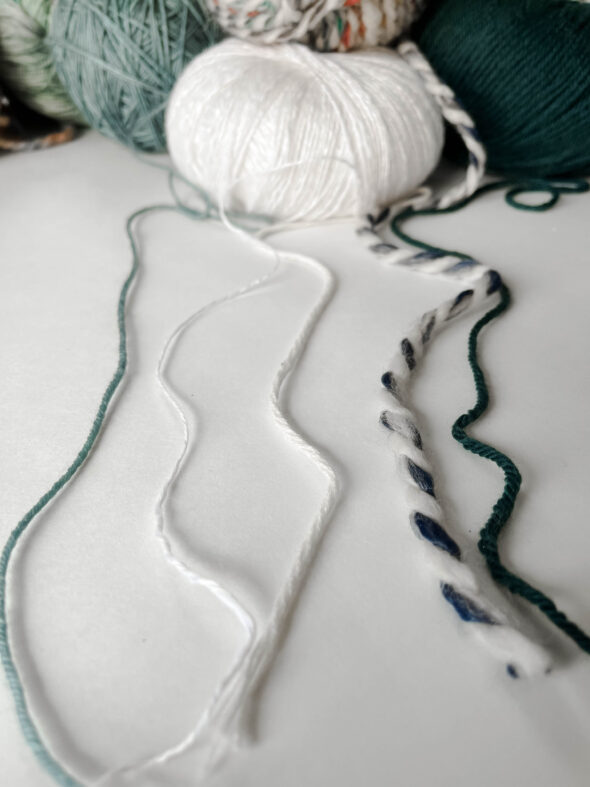
Here’s a great example. Let’s say you are knitting a hat. The knitting pattern suggests a kind of yarn that’s a blend of merino wool and cotton. You didn’t look up the yarn before choosing though, because you saw it indicated “worsted weight.” So you chose a yarn you liked the feel of that was worsted weight; it happened to be 100% cotton.
This is a problem, though.
The wool blended with the plant fiber creates a bouncy but soft and smooth yarn. The hat will hold its shape because of the wool, but will have a softness and smoothness to it because of the plant. Not to mention, wool will add warmth and strength to the plant fiber so your hat will be able to withstand all sorts of weather and temperatures.
With your yarn choice of just cotton, your hat may come out bulkier and shapeless, as well as lacking warmth and durability. The stitches may not hold up very well either, meaning after a little while the hat may start to show wear and not look as good – aka, get stretched out with repeated washing.
You may blame the pattern and think it was poorly designed… but really the issue was not paying closer attention to the fiber content of the suggested yarn!
#7 Care Instructions
The last thing you’ll find on a yarn label are the suggested care instructions for the particular type of yarn. Why is this important? Well, different fibers are machine washable … others are not.
Some can go in the dryer…. some can’t Some can be ironed, others would melt if a hot iron touched them. You get the idea.
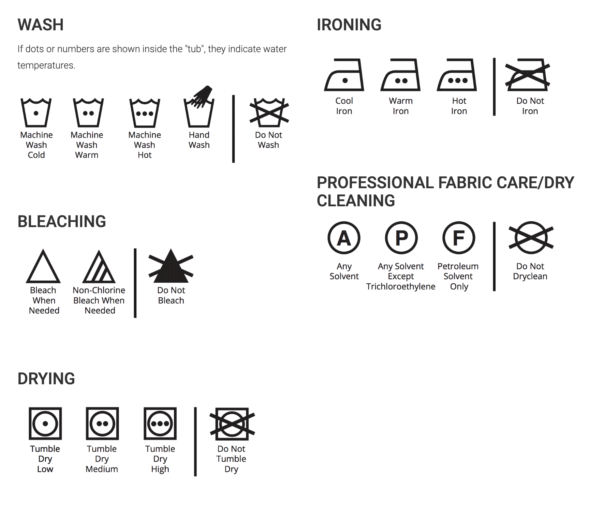
The Craft Yarn Council developed a series of care symbols that most companies use on their yarn labels to describe the best way to take care of anything you knit with that yarn. Your yarn fiber will thank you, and so will your finished object, if you follow those care instructions.
I hope this has helped you better understand how to read a yarn label, so the next time you’re picking a yarn for your knitting project… you know exactly what all the information and symbols on the label mean! If you found this useful, feel free to share it in case it may help someone else, too. Be sure to leave a comment and let me know what you found most interesting about all the info on a yarn label.
Happy Knitting,
Amanda
4 responses to “How to Read a Yarn Label: Choose the Right Yarn for your Knitting Project”
[…] Information about category weight and yardage of yarn is all contained on the yarn label. Get more information about how to read a yarn label right here. […]
[…] Information about category weight and yardage of yarn is all contained on the yarn label. Get more information about how to read a yarn label right here. […]
[…] Information about category weight and yardage of yarn is all contained on the yarn label. Get more information about how to read a yarn label right here. […]
[…] Information about category weight and yardage of yarn is all contained on the yarn label. Get more information about how to read a yarn label right here. […]
Leave a Reply